Foundation Waterproofing Membranes: Types, Installation, and Blue Skin Membrane Explained

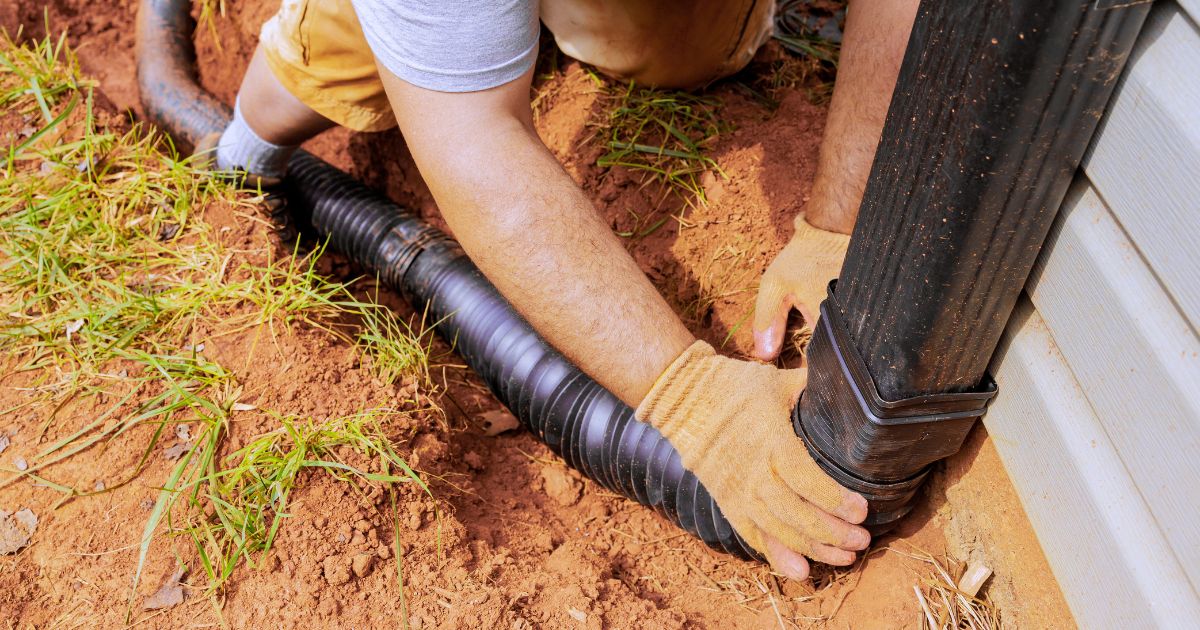
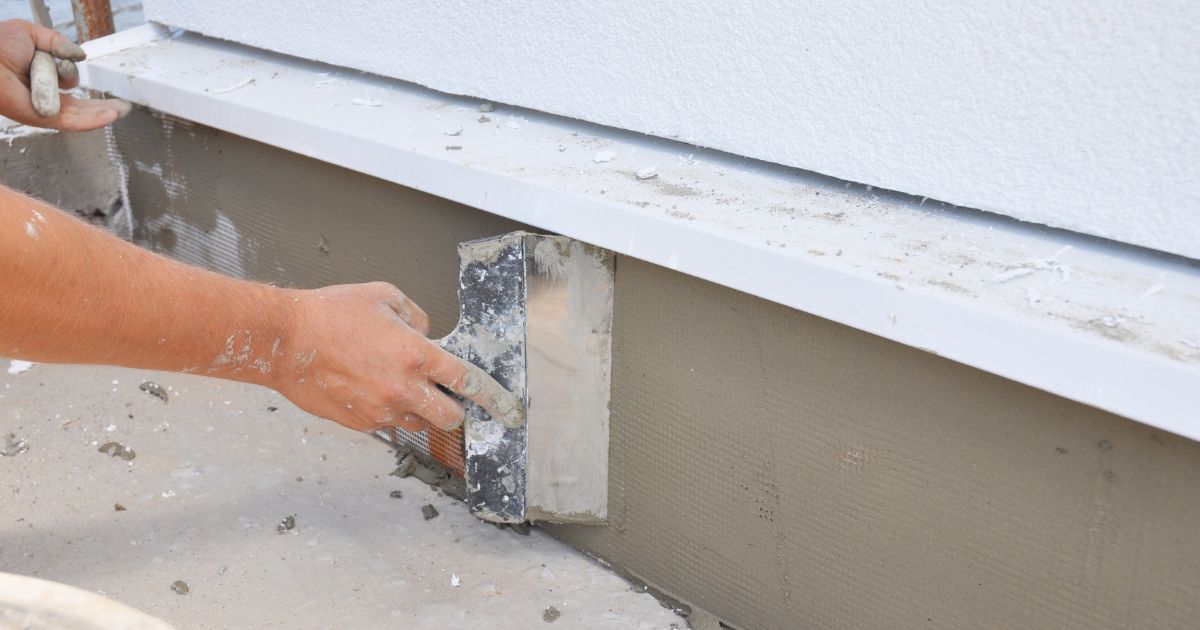
Worker preparing foundation surface for waterproofing membrane application

Foundation waterproofing membranes serve as a critical protective barrier between your foundation and the surrounding soil, preventing water intrusion and extending the life of your structure.


What Is a Foundation Membrane?

A foundation waterproofing membrane is a specialized material designed to create an impermeable barrier that prevents water from penetrating foundation walls and floors. Unlike simple dampproofing, which only resists water vapor, a true waterproofing membrane provides complete protection against both water vapor and liquid water under hydrostatic pressure.


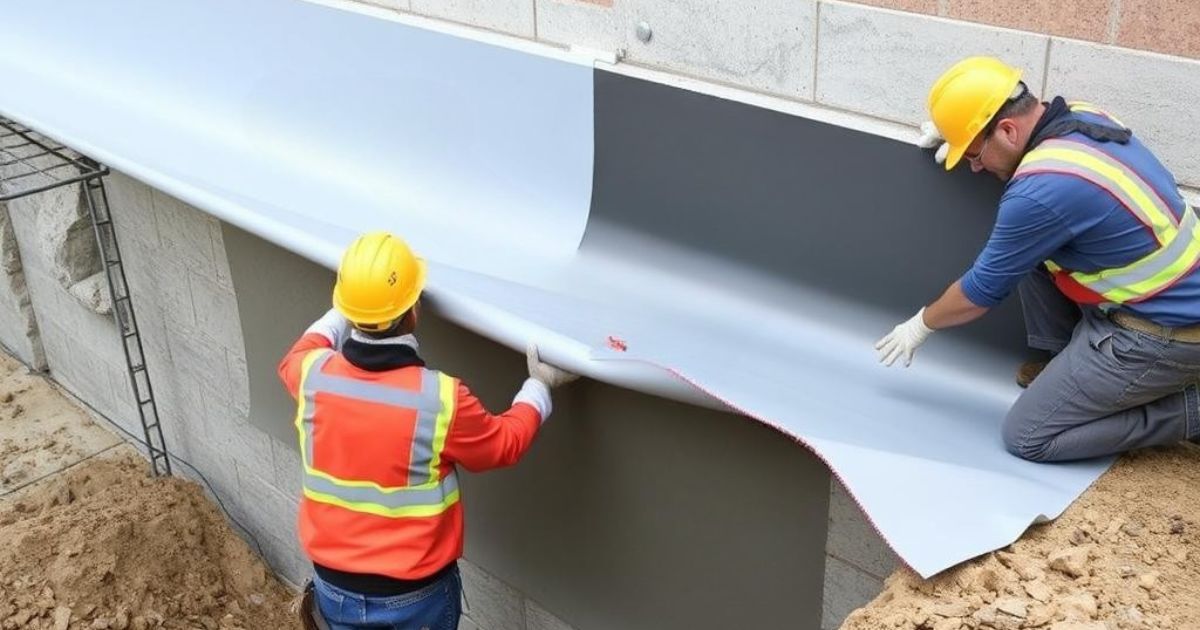
Foundation waterproofing membrane being applied to concrete foundation wall


Common Foundation Membrane Materials

  • Bituminous Membranes: Made from asphalt or coal tar with polymer modifiers, these traditional membranes offer excellent waterproofing properties and are available in both sheet and liquid-applied forms.
  • Polymer-Modified Bituminous Membranes: Enhanced with polymers like SBS (styrene-butadiene-styrene) or APP (atactic polypropylene) for improved flexibility, especially in cold temperatures.
  • Self-Adhesive Membranes: Feature a sticky backing protected by a release paper, allowing for direct application to properly prepared surfaces without the need for torches or adhesives.
  • HDPE Dimpled Membranes: High-density polyethylene sheets with raised dimples that create an air gap between the membrane and foundation, allowing for drainage and pressure relief.
  • Liquid-Applied Membranes: Applied as a liquid coating that cures into a seamless, flexible waterproofing layer, ideal for complex shapes and details.


How Foundation Membranes Work

Foundation waterproofing membranes create a physical barrier that prevents water infiltration through several mechanisms:

  • Water Barrier: The primary function is to block water penetration, even under hydrostatic pressure conditions.
  • Crack Bridging: Quality membranes remain flexible and can span small cracks that develop in the foundation.
  • Drainage Facilitation: Some membranes, particularly dimpled types, create pathways for water to drain down to the footing drains.
  • Vapor Control: Membranes prevent water vapor from migrating through foundation walls.
  • Protection: They shield waterproofing coatings from damage during backfilling and soil settlement.


Protect Your Foundation from Water Damage

Unsure which foundation waterproofing membrane is right for your project? Our experts can help you select the perfect solution based on your specific needs.

Request a Consultation. Call Us Now.


Installation of Foundation Waterproofing Membranes

Proper installation is crucial for the effectiveness of any foundation waterproofing membrane. Following these steps will help ensure a successful application that provides long-lasting protection against water infiltration.


Surface Preparation

  • Clean the Surface: Remove all dirt, dust, debris, and loose materials from the foundation walls using a stiff brush or pressure washer.
  • Repair Defects: Fill all voids, honeycombs, and tie holes with hydraulic cement or appropriate patching compound.
  • Address Cracks: Repair any cracks wider than 1/16 inch using crack injection methods or appropriate fillers.
  • Remove Protrusions: Grind down any sharp protrusions that could puncture the membrane.
  • Check Moisture: Ensure the surface is dry before application, unless using a moisture-tolerant membrane system.


Primer Application

Most waterproofing membranes require a primer to ensure proper adhesion to the foundation surface:

  • Select the appropriate primer recommended by the membrane manufacturer.
  • Apply primer evenly using a roller, brush, or sprayer at the recommended coverage rate.
  • Allow the primer to dry according to manufacturer specifications (typically 1-4 hours).
  • Check for proper tackiness before proceeding with membrane application.


Membrane Application Techniques


Sheet Membrane Application

  1. Start at the lowest point of the foundation and work upward.
  2. Remove the release paper as you unroll and press the membrane firmly against the wall.
  3. Use a roller to press the membrane firmly, removing any air bubbles.
  4. Overlap seams by at least 2-3 inches (or as specified by manufacturer).
  5. Seal all seams and edges with mastic or seam tape.


Liquid Membrane Application

  1. Mix multi-component products according to manufacturer instructions.
  2. Apply with a trowel, roller, or spray equipment at the specified thickness.
  3. Apply multiple coats if required, allowing proper drying time between coats.
  4. Check for proper coverage using a wet film thickness gauge.
  5. Allow the membrane to cure fully before backfilling.


Detailing Critical Areas

Special attention must be paid to vulnerable areas where water infiltration is most likely to occur:

                          Corners                                        Penetrations                            Footing-Wall Joints

Detailing Critical Areas in waterproofing membrane

Protection and Drainage

After the membrane is installed, it must be protected before backfilling:

  • Protection Board: Install protection boards or insulation panels over the membrane to prevent damage during backfilling.
  • Drainage Board: Consider installing a dimpled drainage board or sheet to facilitate water movement to the footing drains.
  • Termination Bar: Secure the top edge of the membrane with a termination bar and seal with mastic.
  • Backfill Carefully: Use clean, free-draining material and avoid sharp objects that could damage the membrane.

Protection board being installed over foundation waterproofing membrane


What Is a Blue Skin Membrane?

Blue Skin membrane is a premium self-adhesive waterproofing membrane recognized by its distinctive blue color. It represents a specific product line within the broader category of foundation waterproofing membranes, offering several advanced features that set it apart from standard options.


Composition and Properties

Blue Skin membrane is typically composed of:

  • SBS-Modified Bitumen: The core waterproofing component, providing excellent flexibility and crack-bridging capabilities.
  • High-Density Polyethylene (HDPE) Film: A tough outer layer that resists punctures and tears.
  • Self-Adhesive Backing: A specially formulated adhesive layer protected by a release paper until installation.
  • Blue Surface Color: The distinctive blue color makes it easy to identify and inspect for complete coverage during installation.


Advantages of Blue Skin Membrane

  • Superior Adhesion: Provides excellent adhesion to properly prepared concrete, masonry, and wood surfaces.
  • Cold Weather Application: Can be installed in lower temperatures than many standard membranes.
  • Self-Sealing: Has the ability to seal around fasteners that penetrate the membrane.
  • Chemical Resistance: Offers excellent resistance to soil chemicals and contaminants.
  • Extended Warranty: Typically comes with longer manufacturer warranties than standard membranes.
  • UV Stability: Better resistance to ultraviolet exposure during construction phases.


Applications for Blue Skin Membrane

Blue Skin membrane is particularly well-suited for:

  • High-End Residential Construction: Where premium protection and long-term performance are priorities.
  • Commercial Buildings: Especially those with below-grade occupied spaces.
  • Critical Waterproofing Areas: Such as plaza decks, planter boxes, and foundation walls with high water tables.
  • Insulated Concrete Form (ICF) Foundations: Where its superior adhesion works well with foam surfaces.
  • Challenging Soil Conditions: Areas with aggressive soil chemistry or high hydrostatic pressure.


Blue Skin foundation waterproofing membrane being applied to foundation wall


Installation Considerations

While Blue Skin membrane follows similar installation principles as other self-adhesive membranes, there are some specific considerations:

  • May require specific primers designed for optimal adhesion with Blue Skin products.
  • Temperature restrictions may be less severe, but still require attention to manufacturer guidelines.
  • Seams and overlaps typically require less additional treatment due to the superior self-adhesive properties.
  • The blue color makes it easier to inspect for proper coverage and identify any missed areas.

“Blue Skin membrane has revolutionized our foundation waterproofing approach. The ease of installation combined with superior performance has made it our go-to solution for high-end residential projects where basement finishing is planned.”

— James Wilson, Certified Waterproofing Contractor


Comparing Foundation Waterproofing Membrane Options


Membrane Type Durability Installation Complexity Best Applications
Bituminous Sheet 20-30 years Moderate Standard residential foundations
Self-Adhesive SBS 25-40 years Moderate High-end residential, commercial
Blue Skin 30-50 years Low-Moderate Premium projects, high water tables
HDPE Dimpled 40+ years Low Drainage-focused applications
Liquid Applied 15-25 years High Complex shapes, repairs


Common Issues and Troubleshooting


Installation Problems

  • Poor Surface Preparation: Inadequate cleaning or moisture on the substrate can prevent proper adhesion.
  • Temperature Violations: Installing membranes outside the recommended temperature range can compromise performance.
  • Improper Overlaps: Insufficient overlap at seams creates potential water entry points.
  • Mechanical Damage: Tears or punctures during installation or backfilling can compromise the system.

Solutions

  • Ensure thorough surface preparation according to manufacturer specifications.
  • Respect temperature limitations or use cold-weather formulations when necessary.
  • Follow overlap guidelines precisely and use recommended seam treatments.
  • Install protection board before backfilling and use care during the backfill process.
  • Inspect the entire installation before covering and repair any defects immediately.

Pro Tip: Always perform a thorough inspection of the membrane installation before applying protection board or backfilling. Look for fish mouths (wrinkles), voids, or areas with poor adhesion. Addressing these issues early is much easier than dealing with water infiltration later.


Worker repairing damaged foundation waterproofing membrane


Maintenance and Long-Term Performance

While foundation waterproofing membranes are designed to be maintenance-free once installed and backfilled, there are several factors that can affect their long-term performance:

  • Drainage System Maintenance: Keep foundation drainage systems (French drains, sump pumps) in good working order to reduce hydrostatic pressure on the membrane.
  • Grading and Landscaping: Maintain proper grading around the foundation to direct water away from the structure.
  • Gutter and Downspout Maintenance: Ensure that roof water is directed away from the foundation.
  • Periodic Inspection: If any portion of the membrane is exposed, inspect it annually for damage or deterioration.
  • Prompt Repairs: Address any signs of water infiltration promptly to minimize damage.


Conclusion

Foundation waterproofing membranes are a critical component in protecting your building’s structural integrity and creating healthy indoor environments. Whether you choose a standard bituminous membrane, a dimpled HDPE product, or a premium option like Blue Skin membrane, proper selection and installation are essential for long-term performance.

Remember that the most effective waterproofing systems combine quality membranes with proper drainage solutions and regular maintenance of the surrounding landscape. While DIY installation is possible for experienced homeowners, professional installation often provides the best assurance of a properly protected foundation.


Get Expert Foundation Waterproofing

Ready to protect your foundation with professional waterproofing membrane installation? Our certified technicians provide free on-site assessments and detailed quotes.

Find a Certified Installer


Frequently Asked Questions


How long do foundation waterproofing membranes last?

The lifespan of foundation waterproofing membranes varies by type and quality. Most quality membranes have an expected service life of 25-40 years when properly installed. Premium products like Blue Skin membrane can last 30-50 years or more. HDPE dimpled membranes are particularly durable, with potential lifespans exceeding 40 years.


Can I install a foundation waterproofing membrane myself?

While DIY installation is possible, foundation waterproofing is critical to your building’s structural integrity. Professional installation is recommended for most situations, especially for self-adhesive and liquid-applied membranes that require careful surface preparation and application techniques. If you choose to install yourself, follow manufacturer instructions precisely and consider hiring a professional for inspection before backfilling.

What’s the difference between damp proofing and waterproofing membranes?

Dampproofing is designed to resist water vapor and soil moisture but will not stop water under hydrostatic pressure. It’s typically a thin asphalt coating. Waterproofing membranes are more robust systems designed to stop both water vapor and liquid water, even under pressure. Waterproofing membranes are thicker, more flexible, and provide significantly better protection, especially in areas with high water tables or poor drainage.


Is Blue Skin membrane worth the extra cost?

Blue Skin membrane typically costs 20-30% more than standard waterproofing membranes, but offers several advantages that may justify the investment: superior adhesion, better cold-weather performance, self-sealing properties, and longer warranties. For high-end homes, buildings with finished basements, or properties in areas with high water tables, the additional protection and peace of mind often justify the premium price.


What is the Blueskin membrane used for?

Blueskin is a self-adhering waterproofing membrane commonly used to protect below-grade foundations, concrete walls, and other structural surfaces from water and air infiltration. It’s especially useful in basements, retaining walls, and under slabs where moisture resistance is critical.

What does Blueskin stick to?

Blueskin adheres best to:

  • Concrete and masonry surfaces
  • Plywood and OSB sheathing
  • Metal surfaces (with proper preparation)
  • Primed surfaces for maximum adhesion

It’s designed to bond tightly to dry, clean, and properly primed substrates to form a continuous waterproof barrier.


Does Blueskin need a primer?

Yes, Blueskin typically requires a primer—especially on concrete or masonry—for proper adhesion. The primer helps ensure the membrane sticks well and creates a watertight seal. Most commonly used is Blueskin Primer (such as Blueskin LVC or Blueskin TWF), depending on the surface type and product version.


Can you put Blueskin on concrete?

Absolutely. Blueskin is ideal for concrete applications, especially for:

  • Foundation walls
  • Footings
  • Below-grade exterior surfaces

Just make sure the concrete is fully cured, clean, dry, and primed before application. This ensures long-term waterproofing performance.


Can Weeping Tile Keep Your Basement Dry?

weeping tile pipe


Yes—a weeping tile system (also known as a drain tile or perimeter drain) can effectively solve basement leaks, particularly those caused by groundwater pressure or poor drainage around the foundation.


What is a Weeping Tile?

Weeping tile is a drainage system installed around the foundation of a home to redirect water away from the structure. Despite its name, it isn’t actually a tile—it’s a perforated pipe designed to collect and drain groundwater, preventing basement flooding and structural damage.


How Weeping Tile Works – Step by Step

  • Subsurface Installation:
    Installed below ground level, typically along the perimeter of your home’s foundation at the footing level.
  • Perforated Drain Pipe:
    A plastic pipe with small holes that allows water to enter without clogging.
  • Protective Filter Fabric:
    The pipe is wrapped in a geotextile fabric to block soil and debris, preventing clogs.
  • Gravel Bedding:
    The pipe is placed in a trench filled with clean gravel, which improves water collection and flow.
  • Water Collection & Redirection:
    Groundwater enters through the gravel and into the pipe, where it is guided away from the foundation.
  • Discharge to Safe Location:
    The collected water is directed to a sump pump, storm drain, or dry well, preventing it from exerting pressure on basement walls.
  • Moisture & Leak Prevention:
    By controlling groundwater, the system relieves hydrostatic pressure and reduces the risk of leaks, dampness, and structural damage.


Weeping Tile Diagram


Proper Weeping Tile Installation

Installing a weeping tile system demands precision and expertise. It’s more than just laying a pipe—incorrect slope, positioning, or drainage setup can lead to persistent water issues or even foundation damage.

General Installation Procedure:

  • Excavation:
    A trench is dug around the foundation (exterior) or along basement walls (interior) down to the footing.
  • Trench Preparation:
    A clean gravel base is laid for proper drainage.
  • Pipe Placement:
    A perforated 4-inch drain pipe is positioned with holes facing down and wrapped in filter fabric.
  • Backfill & Cover:
    Additional gravel is placed over the pipe, followed by soil or concrete to seal the trench.
  • Discharge Setup:
    The system connects to a sump pump or outlet to carry water away from the home.


? When a Weeping Tile System Helps:

  • Persistent leaks after heavy rainfall
  • Signs of hydrostatic pressure (e.g., water through floor or wall cracks)
  • Standing water around the foundation
  • Older homes without an existing drainage system


?️ Types of Weeping Tile Installations:

  • Exterior Weeping Tile:
    Installed outside at footing level. More invasive and costly, but highly effective.
  • Interior Weeping Tile:
    Placed beneath the basement floor along foundation walls. Less disruptive to landscaping, commonly paired with sump pumps.


⚠️ Important Limitations of a Weeping Tile System:

  • Won’t fix cracks or damaged foundation walls by itself.
  • Should be used with waterproof membranes or coatings.
  • Sump pumps are often essential to move collected water safely.


? Common Types of Weeping Tile Pipe

  • Corrugated Perforated Pipe (Flexible):
    • Easy to bend and handle
    • Often includes a fabric sock
    • Suitable for interior or tight spaces
  • Rigid PVC Perforated Pipe (Smooth Wall):
    • Durable with better water flow
    • Best for long, straight exterior installations
  • HDPE (High-Density Polyethylene) Pipe:
    • Highly durable and chemical-resistant
    • Used in both residential and commercial systems

installation of weeping tile drainage

? Common Pipe Sizes

Diameter Best Use
4-inch (100mm) Most common for residential drainage
6-inch (150mm) For higher water volumes or high water tables
8-inch+ Industrial or large-scale applications

Quick Tip: Use 4-inch perforated corrugated pipe with a fabric sock for most residential applications. Always install with a minimum 1% slope and surround with clean gravel and filter fabric.


Correct Slope for Weeping Tile

To function properly, weeping tile must have a slight downward slope so water can flow by gravity.

  • Recommended Slope: 1% (1 inch drop per 8 feet of pipe) or 1 cm per 1 meter in metric.
  • Why It Matters:
    • Too flat: Water may stagnate and cause backups.
    • Too steep: Water may rush through without proper collection.


Proper Grading When Installing Weeping Tile

Grading involves shaping the soil around your home so that surface water flows away from the foundation.

  • Why It Matters:
    Good grading prevents surface water from pooling near the house, supporting the weeping tile system.
  • Ideal Standard:
    Slope soil away from the home by at least 6 inches over 10 feet (or 15 cm over 3 meters).

Pro Tip: Use compacted topsoil to create slopes and keep landscaping properly angled.


Signs of Weeping Tile Problems

If your system isn’t working right, your home may show these signs:

  • Water in the Basement: Dampness or puddles after rain.
  • Musty Smells: Indicate hidden moisture.
  • Efflorescence: White stains from moisture on basement walls.
  • Foundation Cracks: Caused by water pressure.
  • Mold/Mildew: Moist areas promote growth.
  • Overworked Sump Pump: May point to clogs or poor drainage.
  • Standing Water Outside: Sign of improper redirection.

What to Do:


FAQ

Can weeping tile be cleaned out?
Yes, using high-pressure water jetting or drain snakes. Regular cleaning prevents clogs.

What happens when weeping tile fails?
Water accumulates around the foundation, leading to leaks, mold, or structural damage.

How do you make weeping tile?
Modern systems use perforated plastic piping laid in gravel and wrapped in filter fabric.

How long does weeping tile last?
Properly installed and maintained systems can last 30–50 years, depending on material and conditions.


Types of Waterproofing for Homeowners During Construction

Water damage to a home foundation showing the importance of types of waterproofing for homeowners during construction

Building a new home is one of life’s biggest investments. Yet, even the strongest structure remains vulnerable to water damage without proper protection. Water intrusion can compromise your foundation, damage interior finishes, and create unhealthy mold conditions. Understanding the types of waterproofing for homeowners during construction is crucial to protecting your investment for decades to come.

This guide explores the most effective waterproofing methods available during the construction phase—when implementation is most cost-effective and provides maximum protection. We’ll examine each option’s benefits, limitations, and ideal applications to help you make an informed decision for your new home.

Why Waterproofing During Construction Is Critical


Water damage can lead to structural issues and costly repairs if proper waterproofing isn’t installed during construction

Waterproofing your home during the construction phase offers several significant advantages over retrofitting solutions later:

  • Cost-effectiveness: Installing waterproofing systems during construction is substantially less expensive than remedial waterproofing after problems develop.
  • Comprehensive protection: Construction-phase waterproofing allows for complete coverage of all vulnerable areas before they become inaccessible.
  • Structural integrity: Preventing water infiltration from the beginning preserves your foundation’s strength and stability.
  • Health protection: Effective waterproofing prevents mold and mildew growth that can cause respiratory issues and allergies.
  • Property value: A properly waterproofed home maintains its value and is more attractive to future buyers.

According to building experts, water damage accounts for approximately 70% of construction litigation cases. Investing in quality waterproofing during construction can save homeowners thousands in potential repair costs down the road.

application of liquid waterproofing membrane on a foundation wall

Liquid Waterproofing Membranes

Liquid waterproofing membranes create a seamless protective barrier by being applied as a liquid that cures into a flexible, waterproof coating. This method is particularly effective for complex architectural designs with irregular shapes.

Advantages

  • Creates a seamless barrier with no joints or seams
  • Conforms to irregular surfaces and complex geometries
  • Easy application around pipes, corners, and other penetrations
  • Excellent flexibility to accommodate minor structural movement
  • Various formulations available for different climate conditions

Limitations

  • Requires precise thickness control during application
  • Some formulations have longer curing times
  • May require professional application for optimal results
  • Quality depends heavily on proper surface preparation
  • Some types may have strong odors during application

Liquid membranes are ideal for foundations with complex shapes, numerous penetrations, or areas where sheet membranes would be difficult to apply. They’re commonly used on foundation walls, balconies, and below-grade structures.

For complex foundation designs, liquid membranes offer superior coverage and protection.

installation of sheet waterproofing membrane on a foundation (2)


Sheet Waterproofing Membranes

Sheet membranes are pre-manufactured waterproofing layers typically made from modified bitumen, EPDM rubber, or PVC. These factory-controlled products offer consistent thickness and quality assurance.

Advantages

  • Uniform thickness and quality control from factory manufacturing
  • Immediate protection once installed (no curing time)
  • High tensile strength and puncture resistance
  • Long service life with proper installation
  • Some types offer self-healing properties for small punctures

Limitations

  • Seams between sheets can be vulnerable points if not properly sealed
  • Less adaptable to irregular surfaces than liquid applications
  • Installation in cold weather can be challenging
  • Requires careful handling to prevent damage during installation
  • May need additional protection layers before backfilling

Sheet membranes are particularly effective for large, flat foundation walls and horizontal applications like basement floors. They provide excellent protection against hydrostatic pressure in areas with high water tables.

Proper seam sealing is critical for effective sheet membrane waterproofing

application of cementitious waterproofing to a concrete foundation

Cementitious Waterproofing

Cementitious waterproofing systems use specialized cement-based compounds that penetrate concrete surfaces to create a rigid, water-resistant barrier. These systems are particularly popular for concrete foundations due to their compatibility with the substrate.

Advantages

  • Excellent adhesion to concrete and masonry surfaces
  • Can be applied to damp surfaces
  • Non-toxic and environmentally friendly
  • Resistant to UV exposure
  • Cost-effective for large areas

Limitations

  • Limited flexibility – may crack if structure settles
  • Not suitable for areas with significant movement
  • Requires proper curing time
  • May need reapplication over time
  • Less effective against high hydrostatic pressure

Cementitious waterproofing is commonly used for foundation walls, water tanks, swimming pools, and other concrete structures. It’s particularly effective in areas where a rigid waterproofing solution is sufficient.

Pro Tip: For optimal results with cementitious waterproofing, ensure the concrete surface is properly prepared by removing any loose material and creating a slightly rough texture for better adhesion.

bentonite clay waterproofing installation on a fundation wall

Bentonite Clay Waterproofing

Bentonite clay waterproofing utilizes the natural swelling properties of bentonite clay when exposed to water. This expansion creates an impenetrable barrier against moisture infiltration.

Advantages

  • Self-healing properties when minor damage occurs
  • Environmentally friendly natural material
  • Extremely long service life
  • Effective against high hydrostatic pressure
  • Can be installed in various weather conditions

Limitations

  • Higher material cost than some alternatives
  • Requires careful installation to prevent premature hydration
  • Not suitable for all soil conditions
  • Heavier than synthetic membranes
  • May require additional protection layers

Bentonite clay systems are excellent for below-grade foundations, especially in areas with high water tables. They’re available in sheet form, panels, or as a spray-applied mixture.

Bentonite clay expands when wet to create a natural waterproof barrier

Integral Waterproofing

Integral waterproofing involves adding special admixtures directly to concrete during mixing, making the entire concrete structure water-resistant throughout its mass rather than just at the surface.

Advantages

  • Waterproofing protection throughout the entire concrete structure
  • No separate application process required
  • Cannot be damaged during construction
  • Increases concrete durability and lifespan
  • Effective even if surface damage occurs

Limitations

  • Cannot bridge cracks that form after curing
  • May affect concrete setting time and strength
  • Requires careful mix design and quality control
  • Often used as a supplementary rather than primary method
  • Limited effectiveness against high hydrostatic pressure

Integral waterproofing is commonly used in foundation slabs, water tanks, and other concrete structures where water resistance throughout the entire concrete mass is desirable. It’s often combined with other waterproofing methods for comprehensive protection.

Important: When using integral waterproofing, ensure your concrete supplier is experienced with the specific admixture being used, as improper mixing can affect concrete performance.

integral waterproofing admixture being addedd to concrete mix

Drainage Systems

While not waterproofing in the traditional sense, proper drainage systems are essential components of a comprehensive waterproofing strategy. They redirect water away from the foundation rather than trying to block it.

French Drains

Perforated pipes surrounded by gravel that collect and redirect groundwater away from the foundation.

Exterior Drain Tiles

Drainage pipes installed around the foundation perimeter at footing level to collect and divert water.

Sump Pump Systems

Mechanical systems that collect water in a sump pit and pump it away from the foundation.

Drainage Mats

Dimpled plastic sheets that create a gap between the soil and foundation wall, allowing water to drain downward.


A properly designed drainage system works in conjunction with waterproofing membranes to create a comprehensive moisture management strategy. Even the best waterproofing barrier benefits from reducing the water pressure against it.

Warning: Never connect foundation drainage systems directly to municipal storm sewers without proper permits and backflow prevention devices.

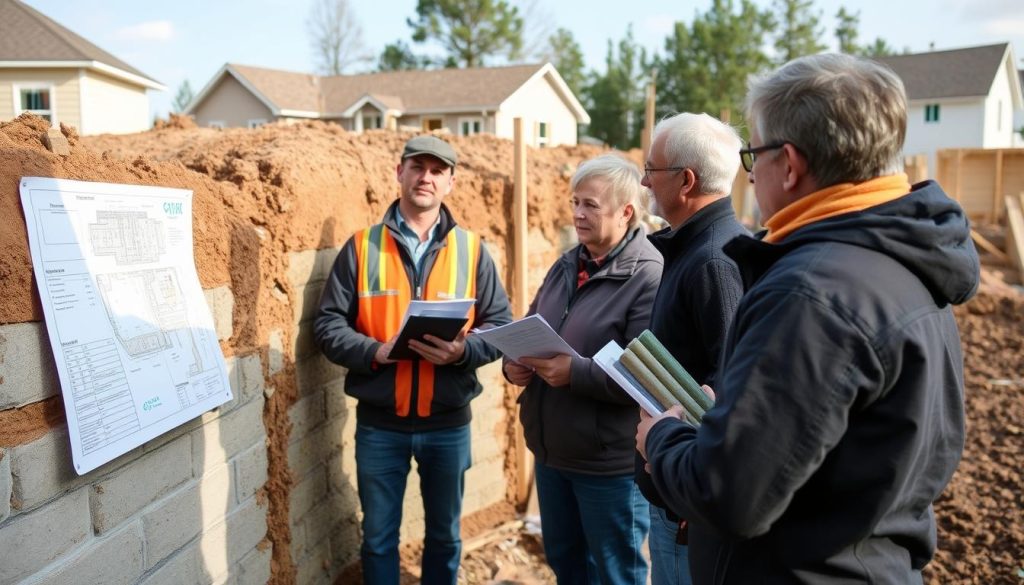
Professional waterproofing consultant discussing optons with homeowners

Key Factors to Consider When Choosing Waterproofing Methods

Selecting the right waterproofing system depends on several critical factors specific to your construction project:

Climate Conditions

Areas with heavy rainfall, high water tables, or freeze-thaw cycles require more robust waterproofing solutions. Consider seasonal variations and long-term climate patterns.

Soil Composition

Clay soils retain water and create higher hydrostatic pressure against foundations. Sandy soils drain better but may require different waterproofing approaches.

Foundation Type

Different foundation types (slab-on-grade, basement, crawlspace) require tailored waterproofing strategies. The depth below grade also impacts method selection.

Budget Considerations

Initial installation costs must be balanced against long-term performance and potential repair expenses. Premium systems often provide better long-term value.

Building Codes

Local building codes may specify minimum waterproofing requirements. Always ensure your chosen method meets or exceeds these standards.

Warranty Protection

Consider the length and coverage of manufacturer warranties. Professional installation may be required to maintain warranty validity.

Waterproofing Method Best For Cost Range Typical Lifespan
Liquid Membrane Complex shapes, details Moderate to High 10-20 years
Sheet Membrane Large flat surfaces Moderate to High 20-30 years
Cementitious Concrete surfaces Low to Moderate 5-15 years
Bentonite Clay High water table areas High 30+ years
Integral New concrete structures Moderate Lifetime of concrete
Drainage Systems All foundations Moderate 20-30 years

The Benefits of a Combined Approach

Many waterproofing professionals recommend a multi-layered approach that combines complementary waterproofing methods. This strategy provides redundancy and comprehensive protection against various water infiltration pathways.

“The most effective waterproofing systems don’t rely on a single barrier but create a comprehensive moisture management strategy that includes waterproofing, drainage, and proper grading.”

— Building Science Corporation

Common effective combinations include:

  • Integral waterproofing + exterior membrane: Provides both internal and external protection
  • Membrane waterproofing + drainage mat: Creates both a barrier and a pathway for water to drain away
  • Cementitious coating + sheet membrane: Combines rigid and flexible protection systems
  • Any waterproofing method + proper drainage systems: Reduces hydrostatic pressure against waterproofing barriers

While a combined approach may increase initial costs, it significantly reduces the risk of water damage and expensive repairs in the future. The right combination depends on your specific site conditions, budget, and risk tolerance.

Making the Right Waterproofing Choice for Your Home

Waterproofing is not an area to cut corners during construction. The relatively small investment in quality waterproofing can prevent significant expenses and headaches down the road. As you plan your home construction, consider these final recommendations:

  • Consult with specialists: Work with waterproofing professionals who understand local conditions and can recommend appropriate solutions.
  • Consider long-term value: Focus on the lifetime cost of your waterproofing system, not just the initial installation expense.
  • Insist on quality materials: Use products from reputable manufacturers with proven track records and solid warranties.
  • Ensure proper installation: Even the best waterproofing materials will fail if improperly installed.
  • Document everything: Keep detailed records of all waterproofing work for future reference and warranty claims.

By understanding the types of waterproofing for homeowners during construction and making informed choices, you’re taking a crucial step toward protecting your home investment for decades to come.

Need Expert Waterproofing Guidance?

Every home has unique waterproofing requirements based on location, design, and environmental factors. Get personalized recommendations from waterproofing specialists.


What Smart Homeowners Skip When Choosing Gutters and Downspouts

Improperly installed gutter with incorrect slope causing water pooling


Your home’s gutter system is more than just a finishing touch—it’s your first line of defense against water damage. Yet many homeowners overlook critical factors during gutter downspout installation that can lead to expensive repairs down the road. 

The average cost to install gutters and downspouts ranges from $900 to $5,000, making it a significant investment worth getting right the first time. 

This guide reveals the common mistakes smart homeowners avoid and tips when selecting and installing their rainwater management systems.

Gutter vs Downspouts

What is the difference between gutters and spouts?

Many homeowners use these terms interchangeably, but they serve different functions in your rainwater management system:

Gutters

Horizontal channels attached to the edge of your roof that collect rainwater as it runs off. They’re available in various profiles, with K-style and half-round being the most common.

Downspouts (Spouts)

Vertical pipes that carry water from the gutters down to the ground level. They connect to the gutter through a downspout outlet and typically include elbows to direct water away from the foundation.

In some regions, particularly in Canada and parts of the northern United States, gutters are also called eavestroughs. Eavestroughs and downspouts together form a complete system for managing rainwater from your roof.

Various gutter material types displayed side by side

Choosing the Right Type of Gutters and Downspouts

One of the most common questions homeowners ask is, “Which type of gutter is best?” The answer depends on your home’s architecture, local climate, budget, and aesthetic preferences. Understanding the differences between gutter types is crucial for making an informed decision.

Material Matters: Comparing Gutter Options

Material

Durability Maintenance

Best For

Aluminum 20+ years Low Most homes; won’t rust
Vinyl 10-15 years Low DIY installation; budget-conscious
Steel 15-20 years Medium Areas with heavy snow/ice
Copper 50+ years Very Low Historic homes; premium appearance
Zinc 30+ years Very Low High-end homes; develops patina

Gutter Profiles and Sizes

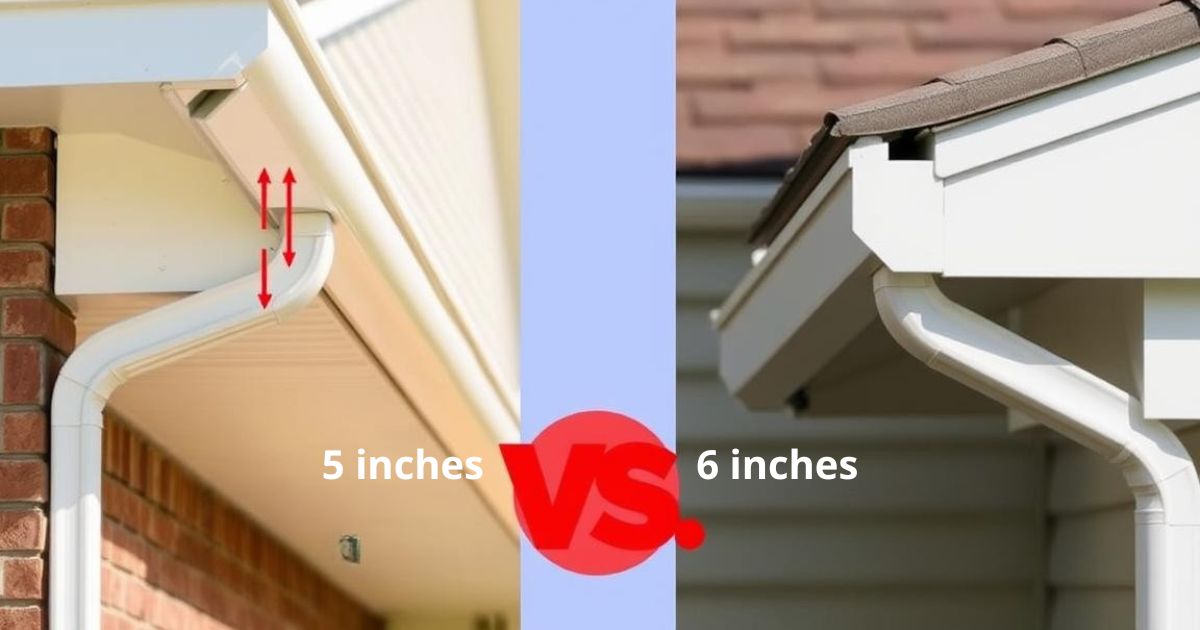
Beyond material, gutters come in different profiles and sizes. K-style gutters are the most common in modern homes, while half-round gutters are often found on older, historic properties. The size of your gutters (typically 5 or 6 inches) should be determined by your roof area and local rainfall intensity.


What Is the Correct Size of Pipe for Gutter Drainage?

Most homes use 3″x4″ downspouts and 4-inch drain pipes. However, large roofs or areas with heavy rainfall may require bigger sizes. Always consult local codes or a professional to determine the proper dimensions.


Here are the quick Pairing Reference:

Gutter Size Recommended Downspout Size
5-inch 2″ x 3″ or 3″ x 4″
6-inch 3″ x 4″
7+ inch 4″ x 5″ or larger


Quick Tips:

  • Always slope the downspouts slightly away from the house. 
  • Use splash blocks or extensions to direct water 4–6 feet from the foundation. 
  • Consider 3″x4″ downspouts if you have: 
    • Lots of trees nearby 
    • Heavy snow or rain 
    • Clogged 2″x3″ pipes in the past


Gutter and Downspout Installation Mistakes to Avoid


Focusing Only on Appearance or Cost

While aesthetics and budget matter, overlooking technical requirements—like slope, size, and placement—can lead to poor drainage, foundation damage, or premature system failure.

Mistake #1: Incorrect Spacing and Placement

A common question is, How many downspouts do I need?” While it depends on your roof size and local rainfall, the general rule is one downspout for every 20 to 40 feet of gutter.

Installing too few downspouts forces each one to carry more water than it should, leading to overflow and water damage during heavy rain. Placement matters just as much—make sure downspouts are installed near roof valleys and corners where water naturally collects, not just where it’s most convenient.

Equally important is downspout placement. Strategic positioning near corners and valleys where water concentrates can prevent overflow. Many installers place downspouts based on convenience rather than optimal water management.

Diagram showing proper downspout spacing on a house

Mistake #2: Slope Miscalculations

Gutters need a slight slope—about ¼ inch per 10 feet—so water flows toward the downspouts. Too little slope causes pooling; too much slope looks bad and can cause water to bypass the downspout entirely.

“The number one reason gutters fail is improper slope during installation.”
– Professional Gutter Installer, 20+ Years of Experience


Mistake #3: Choosing the Wrong Size for Your Roof

The cost of gutters for a 2,000 square foot house typically ranges from $1,050 to $2,400, but choosing the wrong size can make this investment ineffective. 

Standard 5-inch K-style gutters work for most homes, but houses with steep roofs or in high-rainfall areas may require 6-inch gutters and larger downspouts to handle increased water flow.

Comparison of different gutter sizes on homes

Not Sure About Your Gutter Sizing?

Our experts can help determine the perfect gutter system for your home’s specific needs.


Mistake #4: Failing to Protect Your Foundation

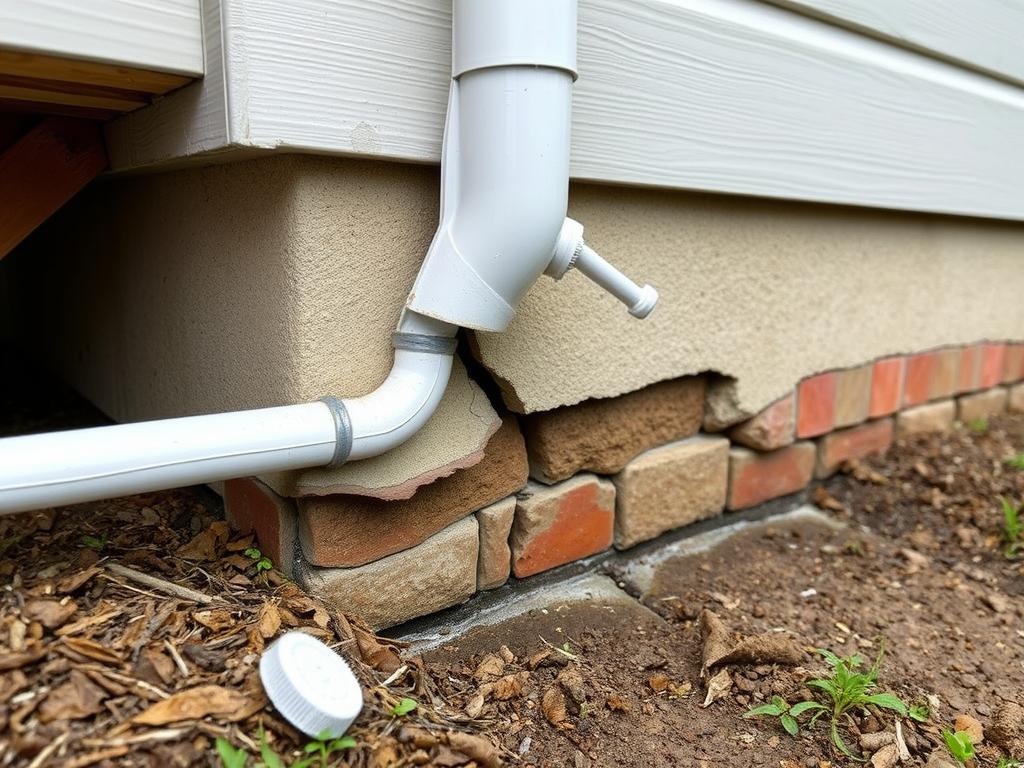
The primary purpose of gutters and downspouts is to protect your foundation from water damage. When downspouts discharge water too close to the foundation, they can actually contribute to the very problem they’re meant to prevent. Water pooling around your foundation can lead to cracks, basement flooding, and even structural instability.

Water damage to foundation from improper downspout drainage

Tips for Installing a Gutter Drain

Here are key tips to ensure a functional and long-lasting gutter drainage system:

  1. Ensure Proper Slope
    Drain pipes should slope away from the foundation at a minimum of 1/8 inch per foot to allow gravity to carry water effectively. 
  2. Choose the Right Type of Pipe
    Use solid pipes for direct water conveyance and perforated pipes for water dispersion in garden beds or gravel trenches. 
  3. Use the Right Pipe Diameter
    Typically, a 4-inch diameter is sufficient for most homes, but consider 6-inch pipes for areas with high rainfall or steep roofs. 
  4. Avoid Sharp Bends
    Sharp turns reduce flow and increase clog risks. Use wide-sweep fittings or gentle curves. 
  5. Install Debris Traps or Filters
    Fit leaf traps or filters where downspouts enter the drain pipe to catch debris before it enters underground systems. 
  6. Bury Pipes Below Frost Line
    In cold climates, bury the pipe deep enough to avoid freezing and damage during winter
  7. Use Cleanouts or Access Ports
    Install access points to make future cleaning or unclogging easier. 
  8. Secure with Gravel or Proper Bedding
    Lay the pipe on a bed of gravel or sand to promote drainage and stability. 
  9. Test Before Covering
    Run water through the entire system to check flow before burying or securing final components. 
  10. Check Local Codes
    Some municipalities restrict direct discharge into storm drains or require specific drainage zones. 

These tips help prevent backups, reduce erosion, and increase the system’s durability and effectiveness.

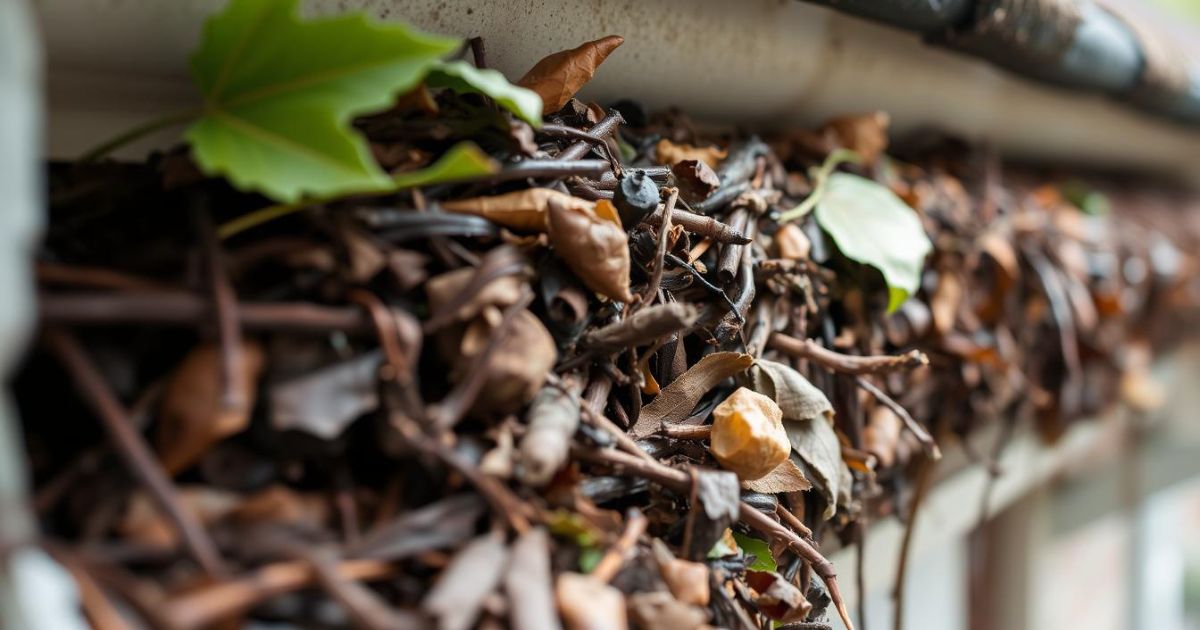
 Clogged gutter filled with leaves and debris

Step-by-Step Gutter Downspout Installation Guide

  1. Measure roofline and determine gutter and downspout placement. 
  2. Mark and cut gutters to fit. 
  3. Attach gutter brackets every 2 feet. 
  4. Install gutters with a slight slope. 
  5. Cut and attach downspouts at designated drop outlets. 
  6. Secure downspouts to the wall and connect to drainage pipe or splash block. 


Dos and Don’ts When Installing Gutter Drain Pipes


Do:

  • Use PVC for durability 
  • Bury pipes below the frost line 
  • Slope drain pipes properly 

Don’t:

  • Connect to sanitary sewer 
  • Ignore root-prone areas 
  • Use undersized pipes for large roofs 


Average Installation Costs in Hamilton (2025)

By Material:

  • Aluminum Gutters: 
  • $6–$12 per linear foot 
  • Downspouts: $5–$8 per foot 
  • Vinyl Gutters: 
  • $3–$5 per linear foot 
  • Downspouts: $5–$8 per foot 
  • Copper Gutters: 
  • $35+ per linear foot 

Total Installation Estimates:

  • 100 linear feet: 
  • Aluminum: $2,500–$3,500 
  • Copper: $2,500–$4,000 
  • 200 linear feet (average home size): 
  • DIY Aluminum: ~$1,500 
  • Professional Installation: Up to $3,000 


Factors Influencing Cost

  • Home Design: Multi-story homes or complex rooflines can increase labor costs. 
  • Material Choice: Higher-end materials like copper elevate the overall expense. 
  • Additional Features: Gutter guards, downspout extensions, or heating elements for ice prevention add to the total cost. 
  • Labor Rates: Professional installation ensures quality but comes at a higher price.


Recommendations

  • Aluminum gutters offer a balance between cost and durability, making them a popular choice for many homeowners. 
  • Vinyl gutters are cost-effective but may require more frequent replacements in harsh climates. 
  • Copper gutters provide longevity and a distinctive look but come with a higher upfront cost.


Cleaning Gutters and Downspouts—What You Shouldn’t Ignore

Even the best-installed gutter system will fail if not properly maintained. Regular cleaning is essential, yet many homeowners either neglect this task or don’t do it thoroughly enough.

The Hidden Dangers of Debris Buildup

Leaves, twigs, and granules from roof shingles can accumulate in gutters, creating dams that prevent water flow. This standing water becomes a breeding ground for mosquitoes and can seep into your roof structure or overflow onto your siding.

Person cleaning out clogged downspout

How to Clean Downspouts Effectively

While many homeowners clean their gutters, they often forget about the downspouts. Here’s a simple process to ensure your downspouts remain clear:

  1. Remove debris from the gutter near the downspout opening
  2. Use a garden hose to flush water down the downspout
  3. If water backs up, there’s a clog that needs addressing
  4. Use a plumber’s snake to dislodge stubborn clogs
  5. For persistent clogs, remove the downspout and clean it separately
  6. Flush again with water to ensure the clog is completely cleared

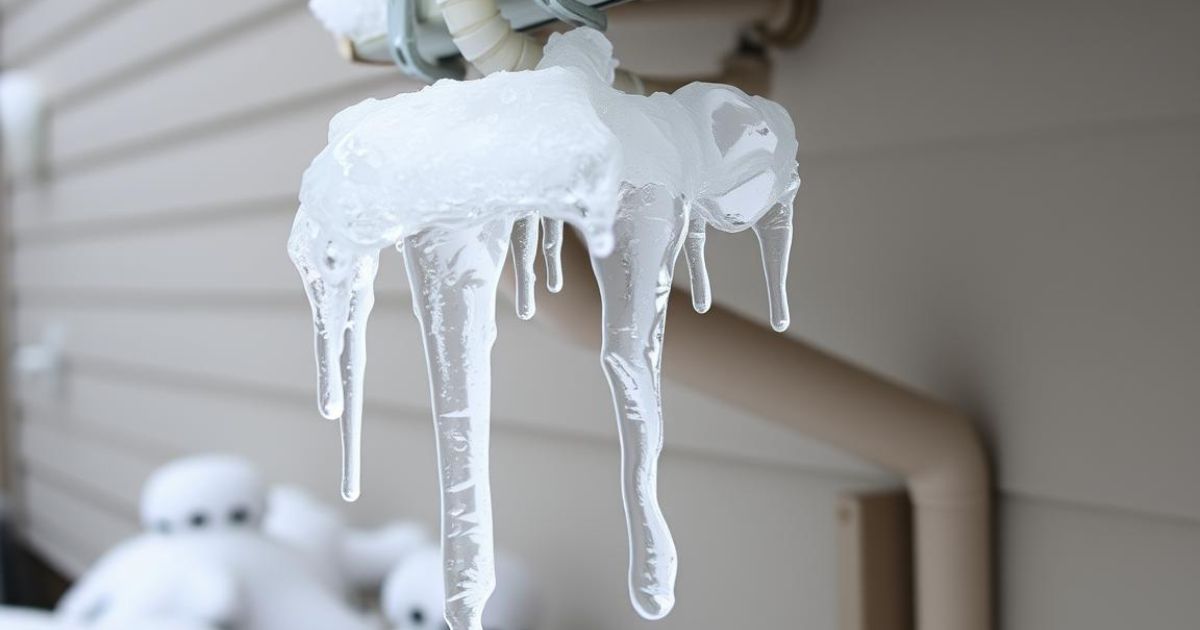
Frozen downspout with ice buildup

Dealing with Frozen Gutter Downspout Issues

In colder climates, frozen downspouts present a serious winter challenge. When water freezes in the downspout, it can back up into the gutter, creating ice dams that can damage your roof and gutters.

Winter Maintenance Tip: 

Never use a hammer or other hard tools to break ice in gutters or downspouts. This can damage the system. Instead, use calcium chloride ice melt products specifically designed for roof use, or install heating cables before winter arrives.


Planning Downspout Drainage the Smart Way

The most overlooked aspect of gutter downspout installation is what happens to the water after it exits the downspout. Without proper drainage planning, even the best gutter system can lead to foundation problems.

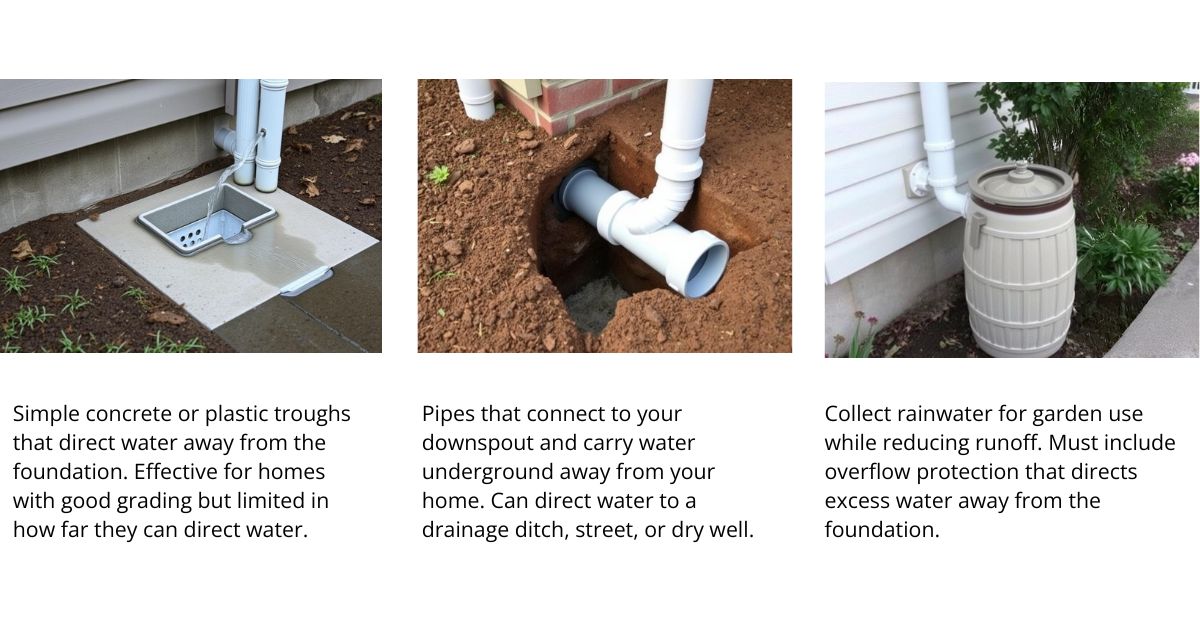
Beyond the Downspout: Drainage Solutions

    Splash Blocks                                                               Underground  Drainage                                           Pipes Rain Barrels

Concrete splash block under downspout

Grading Considerations

The ground around your home should slope away from the foundation at a rate of about 1 inch per foot for at least 6 feet. Proper grading works with your gutter system to ensure water moves away from your home.


Winter Considerations for Downspout Drainage

In colder climates, frozen ground can prevent proper drainage. Underground drainage systems must be installed below the frost line, and above-ground solutions should account for snow accumulation and ice formation.

Warning: Never direct downspout water toward a neighbor’s property. This can create legal liability if water damages their property. Always ensure drainage stays within your property boundaries or connects to approved municipal drainage systems.


FAQs


How much does professional gutter downspout installation cost?

Professional gutter and downspout installation typically costs between $4 and $9 per linear foot for standard materials like aluminum, with the total project ranging from $900 to $5,000 depending on home size, material choice, and complexity. Copper installations can exceed $20 per linear foot.


Can I install gutters and downspouts myself?

While DIY installation is possible, especially with vinyl systems, it requires specialized tools, precise measurements, and careful attention to slope calculations. Most homeowners find that professional installation ensures proper water management and often comes with warranties that DIY installations lack.


How often should gutters and downspouts be cleaned?

Most homes require gutter cleaning at least twice a year—in late spring and early fall. Homes surrounded by trees may need quarterly cleaning. Regular inspection after major storms is also recommended to check for clogs or damage.


What’s the best way to prevent leaves from clogging my gutters?

Gutter guards or screens can significantly reduce debris accumulation. Mesh screens, foam inserts, and surface-tension covers are all effective options depending on your local foliage type. While they don’t eliminate the need for occasional maintenance, they can reduce cleaning frequency substantially.


Protect Your Home with Proper Gutter Downspout Installation

Your home’s gutter system plays a crucial role in protecting your foundation, siding, landscaping, and basement from water damage. By avoiding the common mistakes outlined in this guide, you can ensure your gutter downspout installation provides effective protection for years to come.

Remember that proper material selection, correct sizing, strategic downspout placement, and thoughtful drainage planning are all essential components of an effective rainwater management system. Whether you’re installing new gutters or upgrading an existing system, these considerations will help you make informed decisions.


Get Expert Help With Your Gutter Project

Our specialists can help you design and install the perfect gutter system for your home’s unique needs.

Schedule a Free Consultation


Which Waterproofing Is Best For Basement?

a well waterproofed basement


Homeowners often wonder what measures they can take to protect their basements from water damage. The answer lies in understanding the various waterproofing methods available and selecting the most appropriate one for their specific needs.

This article aims to guide you through the different waterproofing techniques, helping you make an informed decision to safeguard your home.

The Importance of Basement Waterproofing

Basement waterproofing is a critical aspect of home maintenance that prevents water damage and ensures a dry, healthy living space. Water intrusion can lead to a myriad of problems, including structural damage, mold growth, and decreased property value.

Common Causes of Basement Water Problems

Understanding the causes of basement water issues is crucial for effective prevention. Common culprits include poor drainage around the home, cracks in the foundation, and heavy rainfall. Identifying these issues early can help homeowners take proactive measures to waterproof their basements.

Signs Your Basement Needs Waterproofing

Homeowners should be vigilant for signs that their basement needs waterproofing, such as water stains, damp walls, and musty odors. Prompt action can prevent minor issues from becoming major problems. Regular inspections can help identify potential issues before they escalate.

Consequences of Ignoring Water Issues

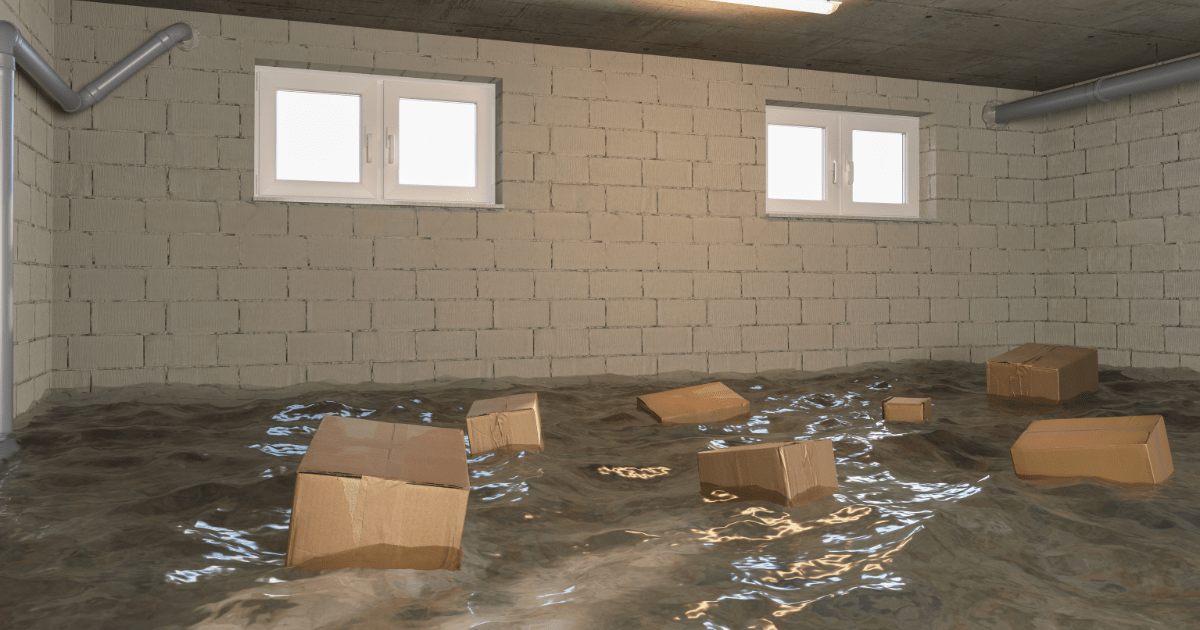
Ignoring water issues in the basement can have severe consequences, including costly repairs, health risks due to mold exposure, and even structural collapse in extreme cases. 

While exploring the importance of basement waterproofing, it’s also worth noting that there are various methods to achieve a waterproof basement. Understanding them can help homeowners make informed decisions about their specific needs.

leaking basement that needs waterproofing


The Three Types of Basement Waterproofing

When it comes to protecting your basement from water intrusion, there are three primary waterproofing methods to consider. Each approach has its unique benefits and is suited to different types of water issues.

Interior Waterproofing Methods

Interior waterproofing involves applying sealants or coatings to the interior walls and floors of the basement to prevent water seepage. This method is often used for basements with minor water issues and can be a cost-effective solution.

Key Benefits: Less invasive, can be DIY, cost-effective for minor issues.

Process:

Interior waterproofing is not technically “waterproofing,” but rather a water management solution. It involves:

  • Installing drainage channels or weeping tiles along the interior perimeter of the basement floor.
  • Directing water to a sump pit, where a sump pump pushes it out and away from your home.
  • Applying waterproof coatings or sealants to interior walls to reduce minor seepage and moisture vapor.

Best Applicability:

  • Homes that experience water seepage through walls or floors during heavy rains.
  • Finished basements that need moisture control without exterior excavation.
  • Budget-conscious homeowners looking for an effective solution without major disruption.

Exterior Waterproofing Approaches

Exterior waterproofing involves excavating around the foundation and applying a waterproof membrane to the exterior walls. This method is more invasive but provides a comprehensive solution for severe water problems.

Key Benefits: Highly effective for severe water issues, long-lasting.

Process:

This is the most comprehensive and long-term method. It involves:

  • Excavating around the foundation to expose the exterior walls.
  • Cleaning and inspecting the foundation for cracks or damage.
  • Applying a waterproof membrane or elastomeric coating to the walls.
  • Installing a drainage board and exterior weeping tile (French drain) at the base of the footing.
  • Backfilling with gravel and soil for proper drainage.

Best Applicability:

  • New home constructions where access to the foundation is easy.
  • Homes with significant water intrusion from the outside due to poor grading or high water tables.
  • Long-term solutions that protect against hydrostatic pressure and structural damage.

installing drainage system to enhance waterproofing of the basement

Drainage Systems for Basement Protection

Drainage systems, such as French drains, are designed to redirect water away from the basement. These systems can be installed both interiorly and exteriorly and are crucial for managing water accumulation around the foundation.

Key Benefits: Effective for managing water accumulation, can be combined with other methods.

Process:

This method focuses on improving water diversion both inside and outside the home:

  • Includes both interior and exterior systems like gutters, downspouts, surface grading, and French drains.
  • Installation of sump pumps and backup systems to handle overflow.
  • Crawl space encapsulation or vapor barriers may also be included.

Best Applicability:

  • Homes with recurring basement flooding or high groundwater levels.
  • Properties in areas with poor soil drainage or sloped yards.
  • Homeowners looking for comprehensive protection that covers multiple entry points for water.

The Common Interior Basement Waterproofing Solutions

To combat basement water issues, interior waterproofing methods offer a range of solutions. Homeowners can choose from various techniques to keep their basements dry and secure.

Waterproof Sealants and Coatings

One of the simplest and most cost-effective ways to start waterproofing your basement from the inside is by applying waterproof sealants and coatings to walls and floors. These products help prevent water seepage through cracks and porous surfaces.

Interior Drainage Systems

Installing an interior drainage system is another effective method. These systems collect water that seeps into the basement and direct it to a sump pump or other drainage outlet. This approach is particularly useful for basements with significant water intrusion issues.

Sump Pump Installation

A sump pump is a critical component of many interior waterproofing systems. It collects water in a sump pit and pumps it out of the basement, away from the foundation.

Standard Sump Pumps

Standard sump pumps are the most common type and are effective for most residential basements. They are typically powered by household electricity.

Battery Backup Systems

Battery backup systems provide additional security during power outages, ensuring your sump pump continues to operate. This is particularly important in areas prone to heavy rainfall or for homes with a history of water issues.

By understanding these interior basement waterproofing solutions, homeowners can make informed decisions about how to protect their basements effectively. Whether you’re looking to DIY or hire a professional, knowing your options is the first step towards a dry and secure basement.

Exterior Basement Waterproofing Methods

To prevent water from seeping into your basement, exterior waterproofing methods are essential. These methods involve protecting your home’s foundation from the outside, which can be more effective than interior solutions in many cases.

Excavation and Membrane Installation

One of the most effective exterior waterproofing methods involves excavating around the foundation and installing a waterproof membrane. This process can be costly, with prices ranging from $8 to $18 per square foot, depending on the complexity of the job and local labor rates. However, it provides a long-lasting barrier against water intrusion.

Exterior Drainage Solutions

Exterior drainage solutions, such as French drains, can also be highly effective in diverting water away from your basement. These systems collect water that accumulates around the foundation and redirect it to a safe distance from the house.

Foundation Crack Repair

Foundation cracks can be a significant source of water leakage. Repairing these cracks is crucial for maintaining a dry basement. Two common methods for crack repair are:

  • Epoxy Injection: A durable, long-lasting solution that bonds well with concrete.
  • Polyurethane Foam Injection: A flexible, water-reactive foam that expands to fill cracks and seal against water intrusion.

Both methods have their advantages, and the choice between them depends on the specific conditions of the crack and the preferences of the homeowner or contractor.

When considering exterior basement waterproofing, it’s essential to weigh the costs against the benefits. While the initial investment can be significant, a well-executed exterior waterproofing project can add value to your home and prevent costly water damage repairs in the future.


exterior waterproofing

Drainage-Based Basement Waterproofing

To waterproof a basement, it’s essential to consider drainage solutions that divert water away from the foundation. Effective drainage is crucial for preventing water accumulation and ensuring the structural integrity of the home.

French Drain Systems

A French drain system is a popular method for basement waterproofing, costing between $1,500 to $3,000. It involves installing a trench filled with gravel and a perforated pipe that redirects water away from the basement.

Gutter and Downspout Management

Proper gutter and downspout management is vital. Ensuring gutters are clear and downspouts extend at least 4-6 feet away from the house can reduce water accumulation risks.

Landscape Grading for Water Diversion

Landscape grading involves adjusting the yard’s slope to direct water away from the home’s foundation, costing $1,000 to $3,000. This method is both effective and cost-efficient.

By implementing these methods, homeowners can reduce basement flooding risks. Considering the cost and effectiveness helps determine the best approach.


Determining the Best Waterproofing Method for Your Basement

To determine the most effective waterproofing method for your basement, you need to consider several critical factors. The process involves assessing your specific water issues, understanding the impact of climate and regional considerations, and evaluating your basement’s type and construction.

Assessing Your Specific Water Issues

The first step in choosing the best waterproofing method is to identify the source and nature of the water problems you’re experiencing. Are you dealing with hydrostatic pressure, surface water accumulation, or condensation issues? Understanding the root cause of the problem is crucial for selecting the most appropriate solution.

Key factors to consider include:

  • The location and severity of water entry points
  • The frequency and duration of water issues
  • The overall condition of your basement’s walls and floor

Climate and Regional Considerations in Canada

Canada’s diverse climate and geography present distinct challenges when it comes to basement waterproofing. From the wet coastal regions of British Columbia to the freezing winters of the Prairies and the high humidity of Eastern Canada, each area demands customized waterproofing strategies.

Water intrusion in Canadian homes is often driven by seasonal snowmelt, persistent rainfall, and freeze-thaw cycles that can lead to foundation cracks and water seepage. In coastal and low-lying areas, high water tables and poor drainage are also common concerns.

Important Canadian climate factors affecting waterproofing include:

  • High snowfall and rapid spring thaw, especially in central and eastern provinces

  • Expansive clay or silty soils, which retain water and increase hydrostatic pressure

  • Deep frost penetration and freeze-thaw cycles, causing cracks in foundations

  • Variable humidity levels, leading to condensation issues in basements

Given these challenges, Canadian homeowners often benefit from a combination of exterior waterproofing systems, interior drainage solutions, and vapor barriers—all designed to protect against moisture intrusion year-round.

Combining Methods for Optimal Protection

In many cases, the best approach to basement waterproofing involves combining multiple methods for optimal protection. This might include using both interior and exterior waterproofing techniques, or integrating drainage solutions with waterproof coatings.

Benefits of a combined approach include:

  • Enhanced protection against various types of water issues
  • Improved durability and longevity of waterproofing solutions
  • Increased peace of mind for homeowners

Factors Affecting Waterproofing Prices

The total cost of waterproofing a basement is influenced by several factors, including the size of the basement, the chosen method, and local labor costs. Understanding these factors can help homeowners budget more effectively.

Financing Options and Insurance Considerations

Homeowners may be able to finance their waterproofing projects through various means, including home equity loans or contractor financing options. It’s also important to check if insurance covers any part of the waterproofing cost, especially if it’s related to a specific damage claim.

DIY vs. Professional Basement Waterproofing

Basement waterproofing can be a DIY project, but knowing when to call in a professional is crucial. Homeowners must assess their specific situation to decide the best approach.

Projects That Require Professional Expertise

More extensive water issues, such as significant leaks, structural damage, or persistent moisture problems, require professional attention. Professionals have the necessary equipment and expertise to diagnose and fix complex problems effectively.

Signs that you need professional help include:

  • Persistent water leakage despite DIY efforts
  • Structural cracks in walls or floors
  • Significant mold or mildew growth

How much is a basement permit in Hamilton?

In Hamilton, Ontario, obtaining a building permit is essential for most basement renovations, including finishing, remodeling, or converting a basement into a legal dwelling unit. The cost of a basement permit varies based on the project’s scope and size.

? Permit Fees

  • Minimum Permit Fee: As of 2024, the minimum fee for processing and issuing a building permit is $277. 


Fee Calculation: Permit fees are typically calculated using the formula:

Permit Fee = Service Index (SI) × Floor Area (A in m²)

Where:

Service Index (SI): Determined by the classification of the work proposed.

Floor Area (A): The total area in square meters involved in the work.

For projects where no new floor area is created, or where it’s challenging to determine the fee based on classifications, the permit fee is 1% of the prescribed value as determined by the Chief Building Official, subject to a minimum fee.

Conclusion

Waterproofing a basement is a crucial investment for homeowners, protecting their property from water damage and potential health hazards. The question remains, is it worth waterproofing a basement? The answer is a resounding yes, as a waterproofed basement can significantly increase a home’s value and provide a safe, dry space for living or storage.

When considering what is the best waterproofing method for basements, several factors come into play, including the type of basement, climate, and specific water issues. By assessing these factors and understanding the different waterproofing methods available, homeowners can make an informed decision. Whether it’s interior waterproofing solutions, exterior waterproofing methods, or drainage-based systems, the right approach can ensure a dry, secure basement.

By choosing the most appropriate waterproofing solution, homeowners can enjoy a range of benefits, from increased property value to reduced maintenance costs. It’s essential to consult with a qualified waterproofing contractor to determine the best course of action. With the right investment, homeowners can enjoy a safe, dry, and healthy living space for years to come.


Basement Waterproofing Services in Hamilton


Protect Your Home from Water Damage with Trusted Basement Waterproofing Company


A damp or leaking basement isn’t just inconvenient—it’s a threat to your home’s structure, air quality, and value. Basement Waterproofing Hamilton offers expert basement waterproofing solutions in Hamilton designed to protect your biggest investment: your home.


Waterproofing Basement in Hamilton: What You Should Know

Is water seeping into your basement? Don’t wait for costly damage. At Hamilton Waterproofing, we offer professional basement waterproofing in Hamilton to protect your home from mold, foundation cracks, and structural decay. Whether it’s a damp smell or standing water, we’ll fix it—fast, and for good.


? How Much Does Basement Waterproofing Cost in Hamilton?

Waterproofing costs in Hamilton vary based on the method, size of your basement, and the extent of the problem. Here’s a general pricing guide:

  • Interior Waterproofing: $70–$250 per linear foot
  • Exterior Waterproofing: $100–$400 per linear foot
  • Crack Injections: Starting at $300 per crack
  • Sump Pump Installation: $1,200–$2,500
  • Full System Install (incl. weeping tile & membrane): $5,000–$20,000+

? Pro Tip: Investing in proper waterproofing can save you tens of thousands in future repairs.


? Our Basement Waterproofing Process

Our proven system for waterproofing basement Hamilton homes includes:

  1. Site Inspection & Diagnosis
    We assess water entry points, foundation condition, and humidity levels.
  2. Custom Waterproofing Plan
    Based on your home’s structure and soil type, we recommend interior, exterior, or combo solutions.
  3. Execution & Installation
    This can involve installing interior drains, vapor barriers, sump pumps, or applying foundation sealants.
  4. Clean-Up & Final Testing
    We leave your home spotless and test all systems to ensure long-term protection.
  5. Warranty Coverage
    Enjoy peace of mind with standard warranties on all waterproofing systems.


?‍♂️ Who to Hire for Basement Waterproofing in Hamilton

Hiring the right contractor makes all the difference. Here’s what to look for:

  • Licensed & Insured
  • Locally Experienced in Hamilton’s soil and weather conditions
  • Detailed Quotes with No Hidden Fees
  • Strong Reviews & Referrals
  • Warranty-Backed Workmanship

At Hamilton Waterproofing, we tick all the boxes—and then some. With over [X] years of experience in waterproofing basement Hamilton properties, we’ve built a reputation for honest service and reliable results.


Signs You Need Basement Waterproofing—Don’t Wait Until It’s Too Late

If you notice any of the following, it’s time to act fast:

  • Damp, musty odors
  • Water stains on walls or floors
  • Mold or mildew growth
  • Cracks in the foundation
  • Peeling paint or efflorescence (white powdery residue)
  • Increased humidity in the basement

Delaying can lead to expensive structural damage and serious health issues. Early action saves time and money.


Our Affordable Water Proofing Services For Your Home


1. Exterior Waterproofing (Foundation Waterproofing)

Best for: Long-term protection


Process:

  • Excavating around the foundation down to the footings
  • Cleaning and repairing foundation walls
  • Applying a waterproof membrane (e.g., rubberized asphalt or liquid rubber)
  • Installing a drainage board and weeping tile system
  • Backfilling with gravel and soil


2. Interior Waterproofing (Weeping Tile System or Drain Tile)

Best for: Homes with water already entering the basement


Process:

  • Breaking the concrete floor along the foundation wall
  • Installing a perforated pipe and gravel trench to collect water
  • Directing water to a sump pump
  • Re-cementing the floor and installing a vapor barrier


  1. Crack Injection (Epoxy or Polyurethane)

Best for: Hairline cracks in poured concrete walls


Process:

  • Injecting epoxy (structural) or polyurethane (flexible) into the crack
  • Sealing the surface with epoxy paste
  • Monitoring for future cracking

4. Sump Pump Installation

Best for: Homes in low-lying or flood-prone areas


Process:

  • Digging a sump pit inside the basement
  • Installing a sump pump that pushes collected water away from the foundation
  • Adding a battery backup (optional but recommended)

5. Window Well Drainage & Sealing

Best for: Preventing leaks through basement windows
Process:

  • Installing or upgrading window wells
  • Adding proper gravel and vertical drainage pipe
  • Sealing the window frame and wall area

How Our Waterproofing Services Protect Hamilton Homes Year-Round


Hamilton’s freeze-thaw cycles and heavy rains put your foundation to the test. Our system is designed for:

  • All-season durability
  • Protection against mold and rot
  • Structural foundation integrity
  • Healthier indoor air quality

Whether you’re dealing with new construction or an older home, our waterproofing keeps your basement dry and secure—no matter the season.


What to Expect from Our Professional Waterproofing Process

We keep the process smooth and stress-free:

  1. On-Site Inspection
  2. Custom Waterproofing Plan
  3. Transparent Quote with No Surprises
  4. Timely and Tidy Workmanship
  5. Warranty-Backed Results

We treat your home like our own—from protecting your landscaping to cleaning up after the job’s done.


Customer Testimonials: Real Stories from Hamilton Homeowners

“We had water coming into our basement every spring. After hiring Hamilton Waterproofing, the leaks are gone—and the basement smells fresh year-round!”
Lisa M., North York

“Professional, prompt, and fairly priced. Highly recommended for anyone needing basement waterproofing in Hamilton.”
Derek T., Scarborough


Book Your Basement Waterproofing Inspection Today

Don’t let basement leaks become costly disasters. Contact Hamilton Waterproofing today for a free, no-obligation inspection. We proudly serve homeowners across Hamilton and the GTA with affordable, lasting solutions.


? Call Us Today and talk to Us About your Wet Basement Problem


Interior Waterproofing


Interior Waterproofing Solutions Every Homeowner Should Know


If your basement walls are damp, floors are musty, or you’re spotting mold, the problem may be more than just a little moisture—it’s a sign your basement needs interior waterproofing. 

Whether water is seeping through the walls or rising from below, tackling it from the inside can make a huge difference—especially when exterior waterproofing isn’t an option.

If you’re noticing persistent dampness, musty smells, or stains on your walls or floors, don’t wait.

The sooner you act, the more options you’ll have—and the more money you’ll save.


Our Interior Waterproofing Methods


? Basement Interior Wall Surfacing

Professional application of  waterproof coatings and membranes to interior walls to block moisture seepage and protect your home from mold, efflorescence, and water damage. Ideal for unfinished basements or as part of a larger drainage system, this method creates a reliable barrier that lasts.

Best for: Damp or sweating basement walls, light seepage, and cosmetic upgrades.


? Wet Basement Floor Waterproofing

Water rising through the basement slab? We seal porous concrete, fill cracks, and install sub-slab drainage options that divert water before it enters your space. Our team uses industrial-grade floor sealants and vapor barriers designed to withstand hydrostatic pressure.

Best for: Leaking basement floors or high groundwater levels.


?️ Foundation Gap & Crack Repairs

Cracks in basement walls or around pipe penetrations are common culprits of water leaks. We seal these with injection-grade epoxy or polyurethane foam, ensuring water can’t sneak through. For structural cracks, we assess and repair using licensed reinforcement methods.

Best for: Active leaks, vertical wall cracks, or hairline foundation damage.


? Interior Drainage Systems

Our most effective solution for chronic leaks. We install interior perimeter drain tiles beneath the basement floor that capture incoming water and direct it to a sump pump. Covered with gravel and a clean vapor barrier, this system keeps water out of your living space.

Best for: Homes with ongoing water issues, flooded basements, or poor exterior drainage.


⚙️ Sump Pump Installation & Maintenance

We install heavy-duty sump pump systems to eject water away from your foundation before it causes damage. Every unit includes a check valve, sealed lid, and optional battery backup to keep your home protected during power outages. We also provide routine maintenance to ensure it performs when you need it most.

Best for: Any home with drainage systems, or one prone to flooding.


? Backwater Valve Installation

A crucial but often overlooked solution. Backwater valves prevent sewage from backing up into your basement during heavy rains or municipal overflow. Our team installs these in compliance with local building codes, ensuring you’re protected and eligible for insurance benefits.

Best for: Urban homes, low-lying properties, or basements connected to aging sewer systems.


⚠️ Why Go Pro?

Interior waterproofing might seem DIY-friendly, but installing drainage systems, sump pumps, and sealing materials properly requires professional tools and often a proper license—especially when tying into electrical or structural systems.


Hiring a licensed waterproofing contractor ensures:

  • Proper code compliance
  • Access to industrial-grade materials
  • Long-term warranties on work
  • Accurate diagnosis of your water issue


Book Your Free Interior Waterproofing Inspection Today

A small leak today can lead to major repairs tomorrow. Whether you’re in Toronto’s Junction, Hamilton’s West Mountain, or anywhere in between, we’re ready to help. Trust [Your Company Name] to keep your basement permanently dry—with professional-grade solutions that last.


? Call us at 416-236-8721
? Request a Quote Online
? Proudly Serving Hamilton, Toronto & Surrounding Areas


Hamilton Foundation Waterproofing


Protect Your Home from the Ground Up with Trusted Foundation Waterproofing Solutions


A strong home starts with a dry foundation. At Hamilton Waterproofing, we specialize in foundation waterproofing services designed to keep water out and structural integrity in—no matter the season. 

Whether you’re dealing with cracks, seepage, or full-blown leaks, our team delivers expert interior and exterior waterproofing solutions that protect your basement and your investment for the long haul.

Waterproofing your foundation using tried-and-tested professional techniques guarantees durability and long-term protection.


Why Is Foundation Waterproofing Important?

Your foundation is constantly exposed to moisture from rain, snowmelt, and rising groundwater. Without proper waterproofing, this can lead to:

  • Cracks in your basement walls and floors
  • Mold and mildew growth
  • Musty odors and poor air quality
  • Structural damage that lowers your home’s value
  • Expensive repair bills over time

Foundation waterproofing is your first line of defense. It prevents water from entering your home, strengthens your foundation, and creates a healthier, more livable basement environment. In Hamilton’s wet climate, this isn’t just a good idea—it’s a must.


✅ Professional Steps in Waterproofing a Foundation

1. Site Inspection & Assessment

  • Evaluate soil conditions, drainage issues, and water intrusion points.
  • Identify structural cracks, wall seepage, or existing waterproofing failure.

2. Excavation (for Exterior Waterproofing)

  • Dig down to the foundation footings, typically 6–8 feet.
  • Ensure clear access to all sides of the foundation walls.

3. Surface Cleaning & Preparation

  • Clean foundation walls thoroughly—remove dirt, old coatings, and debris using wire brushes or pressure washers.
  • Allow the surface to fully dry before proceeding.

4. Crack & Joint Repairs

  • Fill cracks and gaps with hydraulic cement or epoxy injection systems.
  • Reinforce joints and pipe penetrations with flexible sealants.

5. Application of Waterproofing Membrane

  • Apply liquid rubber membrane, bituminous coating, or peel-and-stick sheet membranes to exterior walls.
  • Professionals use sprayers or rollers for even coating.
  • Overlap seams and extend coverage above soil grade.

6. Installation of Drainage System

  • Exterior: Install a perforated drain pipe (French drain) at footing level, wrapped in filter fabric and covered with gravel.
  • Interior: For retrofit jobs, cut and trench inside slab to install drain tile system connected to a sump pump.

7. Protective Layer Installation

  • Apply a drainage board or insulation panel to protect the waterproofing membrane from damage during backfilling.
  • Enhances water flow to the perimeter drain.

8. Proper Backfilling

  • Use clean, free-draining fill (e.g., gravel or sand).
  • Compact in layers to reduce pressure on foundation walls.

9. Surface Water Management

  • Extend downspouts at least 5 feet away from the foundation.
  • Ensure grading slopes away from the structure (minimum 5% slope for 10 feet).

10. Final Inspection & Maintenance Plan

  • Check for gaps or inconsistencies in coverage.
  • Schedule periodic inspections (especially after heavy rains) to monitor effectiveness.


How To Waterproof a Foundation: Tips from Pros

Here’s a step-by-step guide from the pros in Waterproofing your foundation:

1. Inspect and Prepare the Area

✅ What the Pros Do:

  • Look for existing cracks, water stains, or efflorescence.
  • Clean the foundation wall thoroughly to remove dirt, debris, and loose material using a wire brush or pressure washer.
  • Excavate around the foundation if you’re doing exterior waterproofing—dig down to the footings.

2. Repair Cracks and Holes

How the Pros Fix Them:

  • Use hydraulic cement for active water leaks—this expands as it dries and blocks moisture.
  • Apply epoxy or polyurethane injections to seal structural cracks from the inside out.

3. Apply Waterproof Coating or Membrane

Two Common Options:

  • Liquid Rubber Membrane (exterior):
    • Apply with a roller or sprayer
    • Flexible and long-lasting
  • Cementitious Waterproofing (interior):
    • Easy to apply like paint
    • Works best for minor moisture problems

Pro Tip: Let coatings cure properly before backfilling or finishing interior walls.

4. Install a Drainage System

Exterior:

  • French Drain or Weeping Tile System at the base of the foundation
  • Covered with gravel and filter fabric to prevent clogging

Interior:

  • Interior Drain Tile System under the basement slab, directing water to a sump pump

Pro Tip: Always slope your drainage pipes away from the home.


5. Apply a Waterproof Barrier or Sheet Membrane (Optional but Ideal)

  • Peel-and-stick sheet membranes or drainage boards add an extra layer of defense
  • Protect coatings from damage during backfilling

6. Backfill Properly

  • Use clean gravel or soil that drains well
  • Avoid heavy clay or materials that hold moisture

7. Maintain Gutter and Grading Systems

  • Ensure gutters and downspouts channel water at least 5 feet away from your foundation
  • Regrade your landscaping if water flows toward the house

Pro Tip: Annual inspections of your drainage and foundation keep problems from escalating.


?️ Preparations Before Waterproofing Foundations


1. Conduct a Thorough Inspection

  • Check for:
    • Wall cracks
    • Damp spots or water stains
    • Mold or mildew
    • Efflorescence (white mineral deposits)
  • Inspect both interior and exterior foundation walls.
2. Identify the Source of Water Intrusion
  • Determine if water comes from:
    • Poor surface grading
    • Clogged gutters or downspouts
    • High water table
    • Foundation cracks or porous walls
3. Clear the Work Area
  • Remove obstacles around the foundation like:
    • Plants, shrubs, or debris
    • Paved surfaces or landscaping if needed
  • Inside the basement, clear out furniture or stored items.
4. Excavate Around the Foundation (Exterior Jobs)
  • Dig down to the footings to expose the entire wall surface.
  • Ensure safe trenching practices; consider professional excavation for deep foundations.
5. Clean the Foundation Surface
  • Use a wire brush, pressure washer, or grinder to remove:
    • Dirt
    • Loose concrete or coatings
    • Mold or algae
  • Allow the surface to dry completely.
6. Repair Any Structural Damage
  • Fill all cracks and holes using:
    • Hydraulic cement (for active leaks)
    • Epoxy or polyurethane (for structural cracks)
  • Seal pipe penetrations, joints, and wall ties with compatible sealants.
7. Dry the Area Completely
  • Moisture can interfere with the adhesion of waterproofing products.
  • Use fans, dehumidifiers, or allow time for natural drying.
8. Check Weather Conditions (Exterior Jobs)
  • Plan work for dry weather—waterproofing materials may fail if applied in rain or extreme humidity.
  • Temperature should typically be above 5°C (41°F), depending on the product used.
9. Choose the Right Waterproofing System
  • Select based on foundation type, soil conditions, and water exposure:
    • Liquid membranes
    • Sheet membranes
    • Cementitious coatings
    • Drainage systems


Exterior Foundation Waterproofing

Exterior waterproofing involves digging around the perimeter of your foundation to apply a durable, water-resistant barrier. This method addresses water problems at the source, before they ever reach your basement walls.


Benefits of Exterior Foundation Waterproofing:

  • Stops water before it can enter your foundation
  • Long-term solution for persistent leaks or high water tables
  • Includes drainage systems (weeping tile, membranes, and gravel backfill)
  • Ideal for homes with heavy rain or flood risks

Our Hamilton-based crew uses advanced materials and proper grading to ensure water flows away—not toward—your home.


Interior Foundation Waterproofing

If digging up your exterior isn’t feasible, interior foundation waterproofing is an effective alternative. This method involves controlling and redirecting water from the inside, often using drainage channels, sump pumps, and sealants.


Interior Waterproofing Can Include:

  • Interior drainage systems (French drains)
  • Sump pump installation and maintenance
  • Wall and floor crack injections
  • Vapor barriers and moisture control

Waterproofing a foundation isn’t just a one-time task—it’s a long-term investment in your home’s stability and comfort. 


Whether it’s a 50-year-old foundation or new construction, Hamilton Waterproofing provides waterproofing you can count on—inside and out.


FAQ


What is the best method for waterproofing a foundation?

The best method depends on your specific situation, but exterior waterproofing using a liquid membrane + drainage system is the most effective and long-lasting. For interior moisture issues, sealants and drain tiles with a sump pump can be effective as well.


How do I know if my foundation needs waterproofing?

Warning signs include:

  • Damp or musty basement
  • Water stains or mold
  • Cracks in walls or floors
  • Efflorescence (white powder)
  • Peeling paint or warped flooring

If you notice any of these, it’s time to inspect your foundation.


Can I waterproof my foundation from the inside?

Yes, interior waterproofing is possible and often used for minor leaks or cost-effective solutions. However, it doesn’t stop water from reaching the foundation—it only manages it once it enters. Exterior waterproofing is more comprehensive.


How much does it cost to waterproof a foundation?

On average:

  • Interior waterproofing: $2,000–$7,000 USD
  • Exterior waterproofing: $8,000–$20,000+ USD
  • Full excavation and drainage system: $20,000–$40,000 USD

Costs vary by size, depth, soil condition, and severity of the issue.


How long does waterproofing last?

A professionally applied exterior waterproofing system can last 25 years or more, especially when combined with proper drainage and maintenance. Interior systems may need updates every 10–15 years.


Do I need a sump pump with waterproofing?

Not always, but it’s highly recommended if:

  • You have a high water table
  • Your basement floods regularly
  • You’re installing an interior drainage system

Sump pumps actively remove water from around your foundation, preventing buildup.


Can I DIY foundation waterproofing?

You can DIY small fixes like sealing minor cracks or applying interior coatings. But for major leaks, exterior work, or drain systems, it’s best to hire pros to ensure long-term success and avoid structural damage.


Will waterproofing solve my basement mold problem?

Waterproofing stops future water intrusion, which helps control mold. However, existing mold needs to be cleaned and remediated separately. Consider dehumidifiers and proper ventilation as part of a full solution.


Is waterproofing covered by insurance?

Most standard homeowner policies do not cover waterproofing or water damage from poor maintenance. Check with your insurer about flood insurance or endorsements for water backup coverage.


How can I maintain my waterproofed foundation?

  • Keep gutters and downspouts clean and extended
  • Ensure grading slopes away from the house
  • Inspect sump pumps regularly
  • Watch for cracks or signs of moisture and act early

Check out our gallery or ask us for real local project examples—we’re proud to show our work.


? Call Us and Ask Us Which Waterproofing Method Is Right for Your Home

Don’t wait for leaks to appear—protect your home today with Hamilton’s trusted foundation waterproofing company.

French Drain Services in Hamilton


Professional Drainage Solutions by Hamilton Waterproofing

Is your basement constantly damp or flooded after heavy rain? Tired of dealing with poor yard drainage or foundation leaks? Hamilton Waterproofing offers expert French drain services in Hamilton to keep your home dry, protected, and worry-free year-round.


What Is a French Drain?

A French drain is a smart and efficient drainage system designed to protect your home or landscape from excess water buildup. Whether you’re dealing with a soggy yard, water pooling near your foundation, or a damp basement, a French drain helps redirect water safely away — before it causes costly damage.


How Does It Work?

A French drain consists of three key elements:

  • A sloped trench that guides water flow naturally using gravity
  • A layer of gravel or crushed stone that filters water into the system
  • A perforated pipe at the bottom that collects and channels water to a drainage outlet (like a storm drain, sump pit, or dry well)

When water enters the trench, it seeps through the gravel and into the pipe, which carries it away from your home. This simple setup prevents water from saturating your soil, seeping into your foundation, or flooding your basement.


Why It Matters for Hamilton Homes

Hamilton’s weather brings heavy rainfall and snowmelt — both of which can overwhelm poorly drained properties. A professionally installed French drain by Hamilton Waterproofing ensures your home stays protected, dry, and structurally sound all year long.


Where Does the Cost of a French Drain Go?

When budgeting for a French drain installation, it helps to understand what you’re paying for. The total cost depends on several factors that impact materials, labor, and overall complexity.

Here’s what typically affects the price:

? Excavation & Site Preparation
The amount of digging required depends on the location, soil type, and how deep the drain needs to be.

? Materials Used
Costs vary based on the type of gravel, perforated pipe, and geotextile fabric used to keep debris out.

? Drain Length & Design
Longer drains and custom layouts for tricky drainage problems will naturally cost more.

? Indoor vs. Outdoor Installation
Interior French drains (basement systems) often involve concrete cutting and sump pump installation, which can raise costs compared to outdoor systems.

? Labor & Equipment
Professional installation includes skilled labor, equipment use, and cleanup — ensuring it’s done right the first time.


French Drain FAQs


Where should you not install a French drain?


Avoid placing a French drain near trees (roots can damage the system), under driveways without proper reinforcement, or in areas where it may direct water toward your home’s foundation. Also, it’s not ideal in places with a high water table without proper engineering.


How deep must a French drain be?


A typical French drain is about 18 to 24 inches deep, but it can vary depending on the water problem. For serious drainage issues, deeper installations (up to 36 inches) may be necessary.


How much does a French drain system cost?

Costs can range from Php 3,000 to Php 10,000+ per linear meter in the Philippines, depending on depth, materials, and whether it’s installed indoors or outdoors. DIY options can lower the cost, but professional installation ensures proper function.


What is a cheaper alternative to a French drain?


Some lower-cost alternatives include:

  • Dry wells
  • Swales
  • Trench drains (for surface water)
  • Gravel-filled ditches
    These can work for minor drainage issues but may not be as effective for subsurface water.

How long do French drains last?


A well-installed French drain can last 30 to 40 years or more. Lifespan depends on material quality, soil conditions, and proper maintenance (like clearing blockages and root intrusions).


See Our Gallery for French Drain Before And After projects


Stop letting water damage threaten your home. Contact Hamilton Waterproofing today for trusted French drain services in Hamilton. We offer free site evaluations, honest recommendations, and quick installation timelines.


? Call Us Now to Request a Quote Online.
Let’s keep your home dry – the professional way.